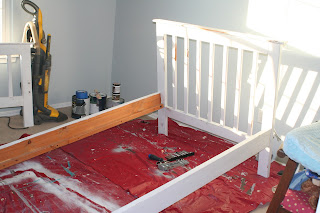
This month I decided to move my son to a big boy bed before my surgery (a few months earlier than I’d planned) so during the transition to being on my own with him again after surgery I wouldn’t have to lift his (at this point 23lbs) weighty self up into the crib. Although, I’ll say that after a week + in his big boy bed I’m not quite sure if I have my head screwed on straight.
Seeing as I didn’t even have a budget for this bed I “needed” to buy and how I love to find good deals and redo furniture, I started searching craigslist. Let me say that if you don’t know what craigslist is, message me and I’ll get you indoctrinated, uh I mean educated to all its wonders. After a few days of searching and debating prospects with my Mom, Aunt, and friend Jen this bed was the winner of my $100 and my *expert* make over skills.
Now for the make over…
Step One. Decide what color of paint to use. Fair warning, this step may take a few days and a couple of trips to the hardware/paint store for samples. I was intending to use white but the left over Martha Stewart “Wrought Iron” blue from Noah’s new shelves (which Daddy and Mr. Jeff built for him) was a good consideration. After going back and forth a few times I decided on white. No, wait blue. Or white? Blue? Okay, blue it is.
Step Two. Light sanding of the rough spots and any dried drips from the prior paint job (I’m not quite sure who manage to slap that last white coat on). Make a mad run to Wal-Mart for new sand paper before nap time. Feed the child McD’s while shopping for your items at said store. Back home you’re going to sand, sand and sand some more. Hopefully if you’re as lucky as me you’ll get this step done before nap time ends. At this point I highly recommend vacuuming up as much sanding dust as possible.
Step Three. Decide how to paint the bed. I know this step seems odd but if you paint each piece laying down on your drop cloth it’s going to take a long time. Paint, dry, flip, paint side 2, dry, flip, paint side 1...you get the picture. So this is where my husband’s wonderful, almost completely organized, extensive set of tools comes in. I got out the Craftsman 8 pc. Standard Reversible Ratcheting Combination Wrench Set that I gave him for his birthday in 2009 (after giving him a son two weeks beforeJ) and started removing the huge bolts from the ends of the rails. I did run into some complications during this process, the metal thread came out with half of the bolts and hubby had to fix it later for me.
Step Four. Once you have the bed put together it’s time to paint! I used a high density foam roller (thanks Jen!) and a 2” brush. I have to stop here and say I LOVE the Grey Gripper primer from Home Depot. I have used it on several pieces of furniture (under red, black, green and now a deep blue) and I am truly impressed. So 1 coat primer and 2 coats color. Since I was using the last remaining amount of paint from painting two shelves I was afraid I’d run out of paint. However, I had the small “sample” can left but the samples are all “flat” colors. So I (as suggested by Jen) used that for my first coat and then used the remaining “semi-gloss” for the second coat. Actually, once I was done I would probably have had enough “semi-gloss” for both coats but oh well, it’s done now.
Finally, purchase mattress and put new Sears’ sale bedding and safety first rails (also a craigslist find) on and one big boy bed is complete. All in all I spent $245. $100 for the bed frame (with a Bunkie board), $75 for the mattress, $50 for the comforter, sheets and waterproof mattress pad cover, $10 for my brand new set of safety first rails off craigslist and about $10 worth of paint and primer. Add one little 19 month old who costs way too much add up and voila you’re done!


